Saturday, 6 June 2015

How to Germinate Tree Seeds

How to Germinate Tree Seeds

Prepare the following materials before you proceed

    A container that can hold hot water and all of your seeds
    Your seeds
    Warm or hot (not boiling) water (this is the summer part)
Place the collected seeds in your container and pour the hot water over them. At this stage, it doesn't matter whether they sink or float.
 Wait 24 to 48 hours and dispose of any floating seeds as they are empty and useless. You may replace the water after 24 hours with more warm or hot water and wait another day if desired.
Drain the water from the container but make sure to take out the seeds first!
Prepare the following materials before you proceed.

    A plastic sandwich bag
    Paper Towel
    Tap Water
    You will need access to a refrigerator (this is the winter part).
Fold the paper towel and moisten it with water so it is wet, but not dripping.
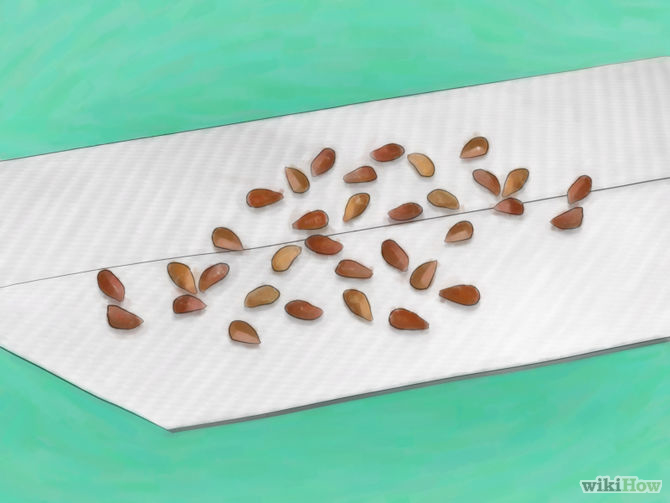
Place your seeds on the paper towel.
insert the paper towel into the plastic sandwich bag.
 Place the plastic sandwich bag in your refrigerator.
 Check your seeds once every month to make sure they aren't rotting.
Take your seeds out of the refrigerator after three months or 90 days.
Sow your seeds inside or out by digging a little hole half an inch deep and covering them with a quarter inch of soil. Make sure your future trees have room to grow until you replant them. (If you replant them)
Watch and wait! your seeds will sprout,

rose seeds grow instructions

 Wipe the pulp off the seeds. If the pulp is left on the seeds, it may prevent them from germinating. One quick way to remove the pulp is to place the seeds in a sieve or mesh, running water through it as you rub the seeds against the sides.


Soak the seeds in diluted hydrogen peroxide (optional). A mixture of water and hydrogen peroxide may reduce the growth of mold on the seeds. Stir 1.5 teaspoons (7 mL) of 3% hydrogen peroxide into 1 cup (240 mL) water.[2] Keep the rose seeds in this solution for at least one hour.
     Some studies suggest that a little mold growth can actually help break down the casing surrounding the seed, but this treatment is still recommended to prevent mold growth in larger amounts.
    A light dusting of anti-fungal powder for plants is an alternative to this step.
Place the seeds in a damp material. Rose seeds typically won't sprout unless they are kept in cold, wet conditions, mimicking a winter environment. Place the seeds between two layers of lightly dampened paper towels, or in a container of dampened salt-free river sand, peat moss, or vermiculite.
    This is the first step in a process called stratification. If you are using store-bought seeds and the label says they are already stratified, skip to the planting seeds section below.
Leave the seeds in the fridge for several weeks. Put the seeds and moist material in a plastic bag or seedling tray in a plastic bag or seedling trays, and keep them in a cold area of a refrigerator, such as an otherwise empty crisper drawer.
    Do not keep them in same area of the refrigerator as fruit or vegetables, which can release chemicals that prevent the seeds from developing
Keep the seed medium slightly damp. Check at least once or twice a week to see whether a sprout has emerged from the seed casing. Add a few drops of water to each paper towel whenever they begin to dry out. Depending on the rose variety and individual seeds, the seeds could take anywhere from four to sixteen weeks to germinate. Often, 70% or more of the seeds never sprout at all.
Fill a container with sterile seed starting mix. Small seedling starting trays make it easy to care for many seeds at once. Alternatively, use plastic drinking cups with a hole punched in the bottom, to make root growth easier to view.
     Regular soil is not recommended, as it may not drain well enough and cause the seedlings to rot.
Plant the seeds. Some store-bought seeds can be planted immediately. If you germinated your own seeds as described above, plant them as soon as they begin to sprout. Plant with the sprout pointed downward, as this is the root. Lightly cover them with soil, about 1/4 inch (6 mm) deep. Space seeds at least 2 inches (5 cm) apart to minimize competition.[5]
    Sprouted seeds should emerge as seedlings within a week. Store-bought seeds that do not require home stratification may take several weeks.[6] Seeds that have not been stratified, using the germination process above, may take two or three years to emerge.
Keep the seedlings in warm, moist soil. Keep the soil damp, but not soggy. A temperature between 60 and 70ºF is(16–21ºC) is ideal for most rose varieties. The seedlings typically thrive on six hours of sun or more each day, but you may wish to research the parent rose's variety to get a better idea of what your rose's prefer.
 Learn when it's safe to transplant seedlings. The first two leaves visible are usually "cotyledons," or seed leaves. Once the seedling grows several "true leaves," with a more typical rose leaf appearance, it is more likely to survive transplanting. Transplanting is also easiest in winter or early spring, not during the height of the growing season.[9]
    It may be a good idea to transplant the seedlings soon if you notice the plant is root-bound, with its roots encircling the container.
    Do not transplant it outside until after the last frost.

 Transplant to a larger pot or outdoors. When you decide to transplant, wait for cool, cloudy weather or early evening, when the plant is losing less water. Moisten the seedling to keep the soil around it together. Dig a hole in the new location, large enough for the root mass, then remove the soil around the seedling in a clump.[10] Transfer this soil clump into the new location, filling the hole with potting soil if the ordinary garden soil is low quality. Water the soil thoroughly after transplanting.
    Try to plant to the same level as before. Do not bury part of the stem that was previously above the soil level.
 Once the transplanted seedling is looking healthy again, you can start watering it as normal. Fertilizing a few times during the warm growing season may help your plant grow and bloom if you follow the fertilizer instructions, but keep in mind that some varieties of rose will not bloom at all during their first year of life.

click here to purchuse yourown rose seeds from past prices ebay store


rainbow rose instructions

Selecting the rose

1 Choose a white rose. Start with a white or very lightly colored rose for making a real rainbow rose. For the purest color, a white rose is best.
    If you cannot find a white rose to use, try a peach, pale yellow, or light pink rose. Avoid using red roses or dark pink roses; dark colors will not work because the deep shade prevents the color from showing through.
    Note: That the stage the rose is in will affect how fast or slowly the dye takes hold. A rose that is near its blooming stage, or already in its blooming stage, will accept the color more readily. On the other hand, a rose in its bud stage will take much longer.

Preparing the rose

Trim the stem. Cut the stem of the rose down so that it is roughly the length you want it to be.
    Use sharp scissors or a sharp knife to cut the bottom of the stem at an angle.
To determine the proper length, base the stem height on the height of the containers you will be dyeing the rose in or the height of the vase you plan to store the rose in afterward. The stem of the rose needs to be only a little taller than the length of the final vase. It should not be too much taller than the height of the dyeing containers though, or else the rose will become top-heavy and will not sit well inside the containers.
Split the stem into sections. Use a sharp blade to split the end of the stem into multiple sections. You can use either scissors or a knife, but either way, the tool you choose must be sharp. The stem of a rose is fairly woody, and if you use a dull blade, you could end up causing the stem to break or tear the rose.
    The cut should extend from the bottom of the rose up to about 1 inch (2.5 cm) away from the base of the petals

Divide the stem into two to four sections. If you cut too many sections into the stem, you risk weakening the stem.
    Note that the number of sections you cut the stem into will determine the number of colors in your rainbow rose.
 Adding the colors

Mix several colors of food coloring into cups of water. Fill a few tall, narrow containers with water and mix in a few drops of food coloring into each container. Choose one different color for each container.
    As mentioned already, the number of colors should match the number of sections you split the stem into.
    The more food coloring you use, the brighter the colors will be in the resulting rainbow rose.
    The best containers will be narrow and sturdy. Avoid using containers with wide lips since the split sections of stem will need to stretch into each container, and wider lips might be harder to stretch the stem sections into. A popsicle mold works well, as do small votive glasses.
Place each stem section into a different container. Carefully place each split stem section into a different container of colored water, making sure that the cut ends are fully immersed.
    Exercise extra caution when bending and positioning the stem sections. The split stem is especially weak, and if you move the sections with too much force, you might end up snapping them on accident.
Let the roses sit for a few days. You should notice some color change within the first 30 minutes, but for a vibrant rainbow rose, you will need to let the rose sit in its dye bath for a few days.
    It may take a full week before the colors become notably vibrant, but after a single day, each of the petals should be tinted with color.[2]    The dyed water will be absorbed through the stem of the rose just like standard water would be taken in. As the dyed water travels throughout the parts of the rose and hydrates the petals, the dye will be deposited in the petals. Since the petals are white, the dye shows through easily.